Master the Art of Phlebotomy: Step-by-Step Guide to Drawing Blood Safely and Effectively
Phlebotomy, the art of drawing blood for medical testing, donation, or transfusion, is a critical skill in the healthcare field. Whether you’re a budding phlebotomist or a healthcare professional looking to refine your technique, understanding the proper methods is essential for patient safety and accurate test results. In this comprehensive guide, we’ll walk you through the step-by-step process of mastering phlebotomy-covering everything from readiness to safety measures-so you can perform blood draws wiht confidence and professionalism.
Understanding the Importance of Proper Phlebotomy Technique
Executing blood draws correctly is vital for patient comfort, safety, and the precision of laboratory results. Improper techniques can lead to complications such as hematomas, infections, or insufficient samples. By mastering the art of phlebotomy, practitioners contribute to overall health outcomes and build trust with their patients.
Meta Title and Description for SEO Optimization
getting Started: Essential Tools and Preparation
Necessary Equipment for Phlebotomy
- Vacutainer or butterfly needle set
- Vacuum tubes for blood collection
- Alcohol swabs or antiseptic wipes
- Tourniquet
- Gauze pads
- Elastic bandage or tape
- Gloves, disposable
- Sharps container for disposal
Patient Preparation
- obtain informed consent
- Verify patient identity and test requisition
- Ensure patient comfort and privacy
- Explain the procedure to reduce anxiety
Step-by-Step Guide to Drawing Blood Safely and Effectively
Step 1: Hand hygiene and Personal Safety
Always begin by thoroughly washing your hands and donning gloves to prevent the spread of infection. Check your equipment for proper functionality and expiration dates before use.
step 2: Selecting the Site
- Most common site: Median cubital vein in the antecubital fossa
- Alternative sites: Cephalic or basilic veins
- Avoid veins that are bruised, swollen, or have signs of infection
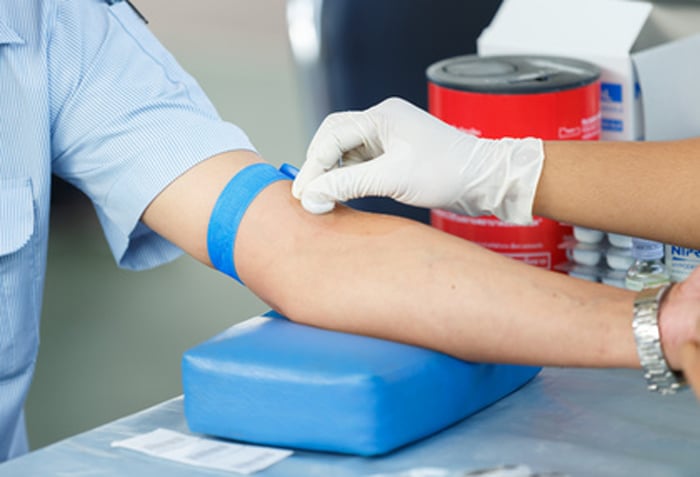
Step 3: Applying the Tourniquet
Place the tourniquet 3-4 inches above the chosen site. Ensure it is tight enough to engorge the vein but not so tight as to cause discomfort or restrict arterial flow. Usually, 1-2 minutes is sufficient.
Step 4: Preparing the Site
Cleanse the puncture site with an alcohol swab, moving in a circular motion from the center outward. Allow it to air dry completely to prevent hemolysis and discomfort during needle insertion.
Step 5: Inserting the Needle
- Hold the skin taut to stabilize the vein
- Insert the needle at a 15-30 degree angle with the bevel facing up
- Advance the needle smoothly into the vein until blood begins to fill the tube
Step 6: Collecting the Blood Sample
- Attach the vacuum tube or blood collection device
- Fill the tubes in the correct order if multiple samples are needed
- Monitor for patient discomfort and avoid excessive probing
Step 7: Removing the Needle and Post-Collection Care
- Withdraw the needle smoothly and swiftly
- Immediately apply pressure with gauze to stop bleeding
- secure the site with adhesive tape or bandage
- Dispose of the needle in a sharps container
Step 8: Labeling and Handling Samples
Label the blood samples accurately with patient details, date, and time. Ensure proper storage and transportation to the laboratory to preserve sample integrity.
Practical Tips for Successful Blood Draws
- Stay patient-focused: Communicate clearly and encourage relaxation.
- Avoid common pitfalls: Do not yank the needle or probe multiple times.
- Know your anatomy: Familiarize yourself with vein locations and variations.
- Practise good hygiene: Hand hygiene and equipment sterilization are critical.
Benefits of Mastering Phlebotomy Skills
| Benefit | Description |
|---|---|
| Enhanced Patient Care | Providing safe and comfortable blood draws builds trust and improves experience. |
| Career Advancement | Proficiency in phlebotomy opens doors to diverse healthcare roles. |
| Accuracy in Results | Proper techniques ensure reliable tests, leading to correct diagnoses. |
| Workplace Safety | Adherence to safety protocols minimizes infection risk for both patient and practitioner. |
Case Studies: Real-World phlebotomy Success Stories
Case Study 1: Overcoming Arduous Veins
Jane, a novice phlebotomist, struggled with patients having small, rolling veins. by applying the tourniquet correctly and using a butterfly needle, she successfully obtained samples on her first try, boosting her confidence and patient satisfaction.
Case Study 2: Reducing Patient Anxiety
Michael noticed some patients were anxious about blood draws.He started explaining the procedure step-by-step and used calming techniques, which significantly reduced discomfort and improved cooperation.
First-Hand Experience: Tips from an Experienced Phlebotomist
“In my years of practice, I’ve learned that patience, gentle handling, and thorough site preparation make a huge difference. Always prioritize patient comfort, and remember-practice makes perfect.” - certified Phlebotomist,Lisa M.
Conclusion: Mastering Phlebotomy for a Safer, More Effective Blood Collection
Becoming proficient in phlebotomy is a rewarding journey that combines technical skill, attention to detail, and compassionate patient care. With this step-by-step guide, you now have the foundational knowledge to perform blood draws safely, effectively, and confidently. Continuous practice, adherence to safety protocols, and a patient-centered approach will position you as a trusted healthcare professional capable of delivering high-quality care. Whether you’re starting your training or honing existing skills, remember that mastery in phlebotomy not only benefits your career but also plays a vital role in accurate diagnostics and improved patient outcomes.